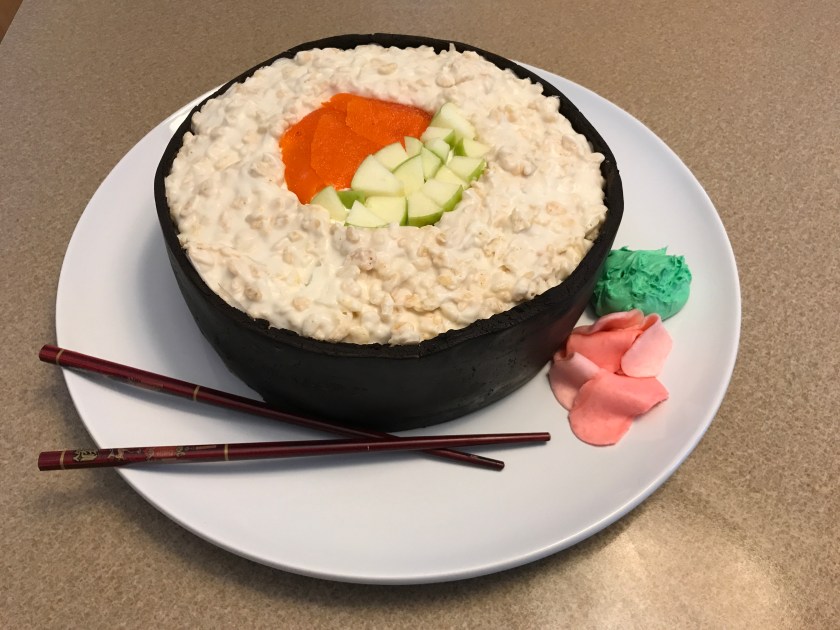
When you give birth to a son on April Fool’s Day, you should be prepared to play some pranks on the kid throughout his life. Unfortunately for me, I am a terrible practical joker. Luckily for him, I AM a heck of a baker, if I do say so myself. Enter “imposter” cakes as the perfect solution for faking out my child on his special day!

Sadly, these can go tragically awry… I fully expected a cake disaster on par with epic Pinterest fails. My newly minted teenager is a big fan of sushi, so what should I make for his birthday cake? A giant California Roll, of course! I had already done one imposter cake for my daughter’s birthday (a mammoth “grilled cheese”), and it came out pretty well. It was at least recognizable as the food I was imitating, but this one was more of a challenge. They wanted me to make my own fondant from scratch, for crying out loud! Worst case, I could always run to Wal-Mart and stick his candles in some cheapie cupcakes if my efforts resulted in something resembling the ill-fated bobble-head Trump cake!
The point of a food imposter is NOT to tell the person receiving it what they are getting. It’s so much more fun to serve up something that gives everyone pause! While flipping through Food Network Magazine for inspiration, I came across the sushi design and just knew that was the one for my boy when his time came. In true ostrich fashion, I committed 100% to making this, a) without reading the recipe ahead of time, and b) not knowing what kind of cake my kid actually wanted to eat! I gathered intel to nail down his favorite flavors, figuring I could make any kind, since if all went well the cake would be hidden inside its disguise.  Let me just take this opportunity to point out that imposter cakes are not known for their spectacular taste. It’s all about the look, baby! With that being said, I had complete freedom to use boxed cake and canned frosting. The Boy wanted coconut chocolate, so I made the simple additions of half a cup of sweetened, shredded coconut and about a teaspoon of coconut extract to the batter. I even went out and specially bought locally-made coconut syrup to brush on the layers for additional moisture and flavor. I learned from watching Spring Baking Championship that even if you have a cake as dry as the Sahara, you can brush on a liquid such as simple syrup and save it. I then promptly forgot to add the aforementioned moisture until I had already frosted the whole dang thing… Ah well, there’s always pancake Sunday!
When making stacked cakes, you are supposed to use a serrated knife to lop off the puffy part. I judiciously saved all the excess cake bits because you can use them to make cake pops. You know… in theory. Probably I’ll just let the kids stuff handfuls of shredded cake into their mouths until it’s gone, or I’ll forget about it in the container until it grows fur. After the cakes are leveled, a crumb coat (a thin layer of icing spread over the whole thing with the express purpose of matting down loose bits) is absolutely necessary. That is, unless you prefer to pick out individual specks of brown cake from the white frosting with your fingernail! This is one place I always struggle, because you have to wait for the cake to be completely cool or it just disintegrates, and also I worry it won’t have enough frosting. This particular design did not call for much in the way of additional frosting between layers or on top. In fact, the frosting was essentially just glue. Believe me, the final product did not lack for sweetness… Now it was time to whip out the tape measure, cardboard and scissors and get to work on the construction of the “fake out” décor. (BTW, if you don’t have one of those spinny things on which you set your naked cake and then twirl it around spreading frosting instead of moving your SELF all around the plate, you need to make the $15 investment. It’s a lifesaver.) Also, I discovered I am missing all my adorable little cardboard cake bases (because how else do you then get the cake OFF the spinny thing??) and I was forced to hand-craft one from a flat-rate postal box and kitchen shears. Necessity really is the mother of invention! Anyway, the first step to sushi roll decorating was to sketch out a 3″ circle (yes, I measured) in the center of the cake, then fill it with “salmon” and “cucumber”. The fish substitute was sliced chili-lime dried mango, which I had to wash off to remove the sugar crystals. They just didn’t add to the look. A diced up Granny Smith apple tossed in lemon juice made the cucumber. All this was arranged in my circle to give me a border to work with when creating the “rice”. But before that, I had to cut a strip of parchment paper to wrap around the cake like a sleeve. This is where the glue-frosting came in handy! Once the sleeve was stuck on and the cake chilled for a bit, I had a mold in which to drop crisped rice cereal (let’s be honest, I’m not getting paid for advertising here, but it was straight up Rice Krispies!) mixed with white, a.k.a. vanilla, candy melts. I used their directed proportions, but I could have added more cereal and it would have looked more realistic. The great thing about the candy melts is that they stayed soft and moldable for quite a while during the decorating, but once fully solidified, they became basically a rice brick. Not so easy to cut slices of cake through all that!
Finally, as the French would say, the “piece de resistance”, homemade fondant. In my case, this was literally the piece I resisted… I simply didn’t see how this was supposed to work! I have no idea how to make fondant or what is normally in it, so for all I know this could be way off from what you get at a bakery. However, whenever I watch a baking show, the judges generally peel off the beautifully designed fondant and discard it like a piece of raggedy parsley from a 1980’s steak dinner plate. What a waste of effort. Alas, this fondant was to be the seaweed to my sushi, so I had to give it a go. Before I hear any backtalk, yes, I KNOW seaweed is more green than brown, but the recipe is made with cocoa powder as the only coloring. So brown it is! 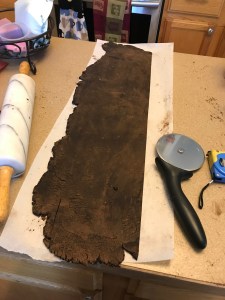 Basically the only thing in this was sugar, sugar and more sugar: 10 ounces of mini marshmallows and a little water microwaved to melting, then a POUND of powdered sugar is mixed in, followed by a cup and a half of dark cocoa. Oh yeah, then throw in some butter. Just in case diabetes doesn’t get you, we needed a nod to artery blockage! I’ve gotta say, when I plopped this mess onto the parchment to roll it out, “seaweed” was not the first comparison I made. Moving on… A rolling pin and some elbow grease eventually resulted in a long, flat strip of fondant which I trimmed with a pizza cutter to give precise edges, and once wrapped around the cake, it really did look pretty amazing! And you know what? It didn’t taste awful, either! I’m not saying I wanted to eat a pound of it, but it definitely made up for limited frosting. Final touches were the “wasabi” (vanilla icing tinted with green food coloring) and “ginger” (Starburst candies squished with the rolling pin). In the end, I was proud to serve this cake to my son, and I enjoyed watching people guess what all the parts were made from. From here on out, I don’t think this kid is getting anything but imposter cakes from this mama!