The Pressure is On!

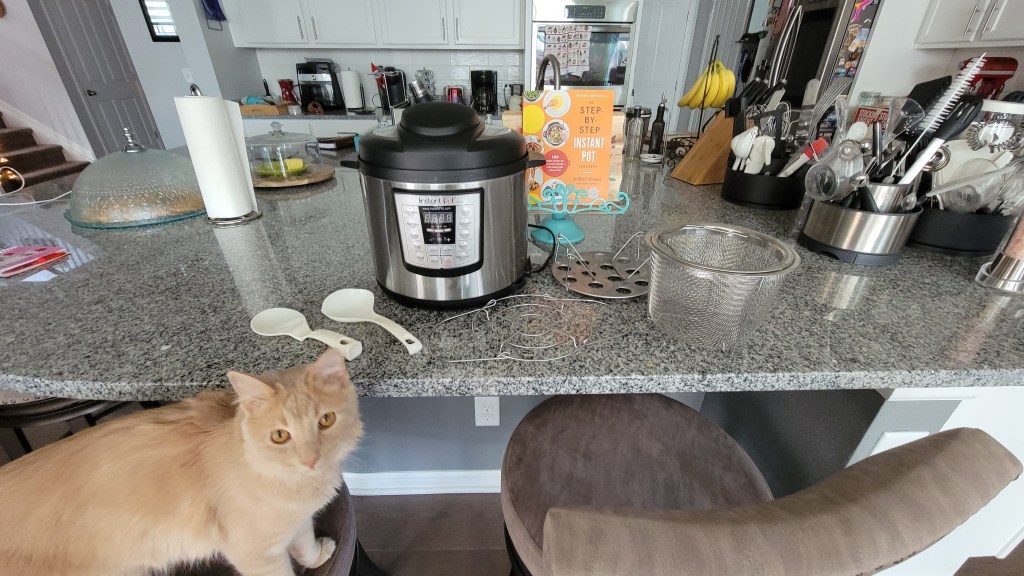
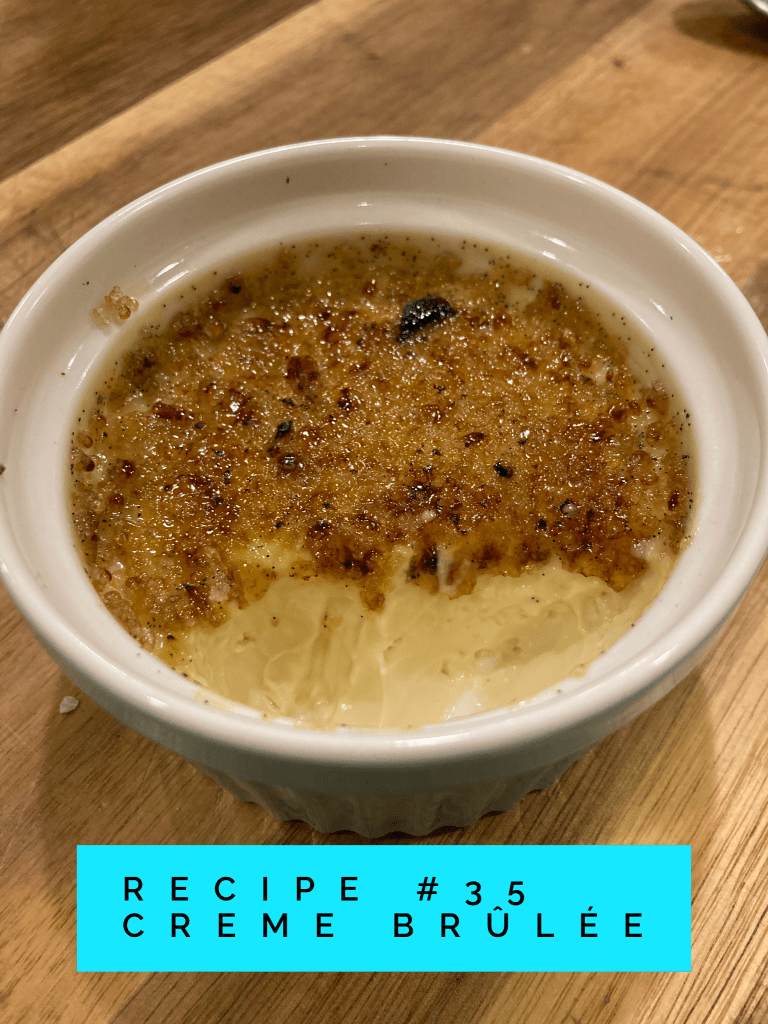
And yes, the “pressure” jokes will be a regular thing, just get used to it! Now that that’s out of the way, shall we just proceed to the recipes? I thought so…

The poker night crowd pleaser may just win you a blue ribbon too!
Chili Doppelgängers?

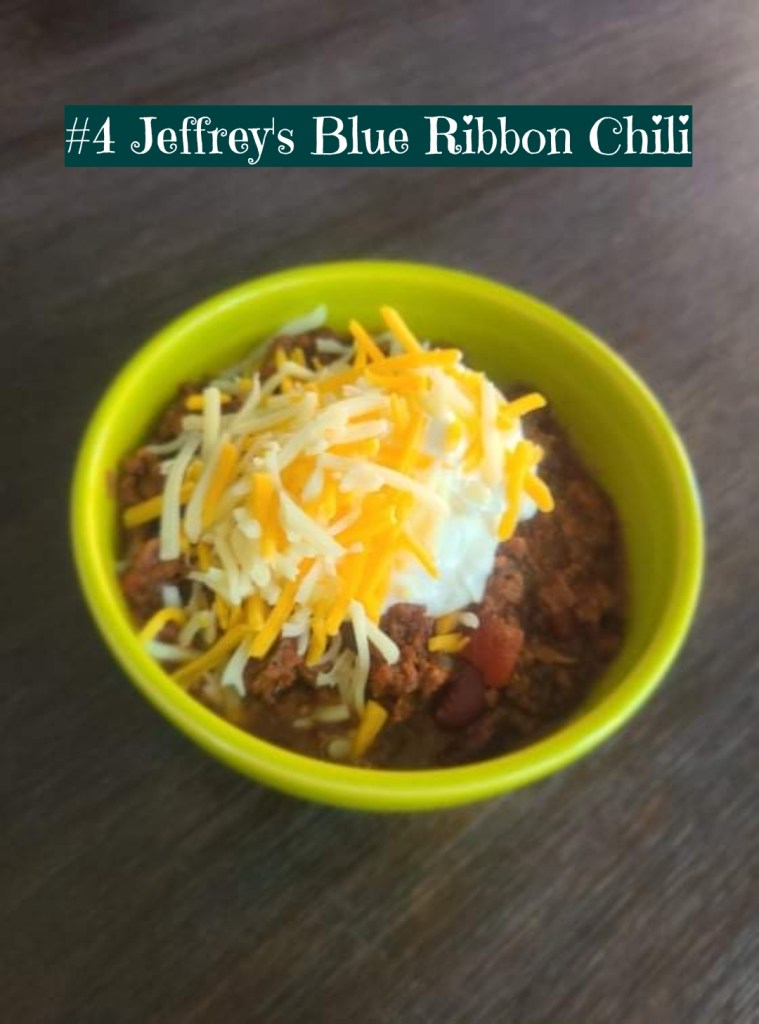
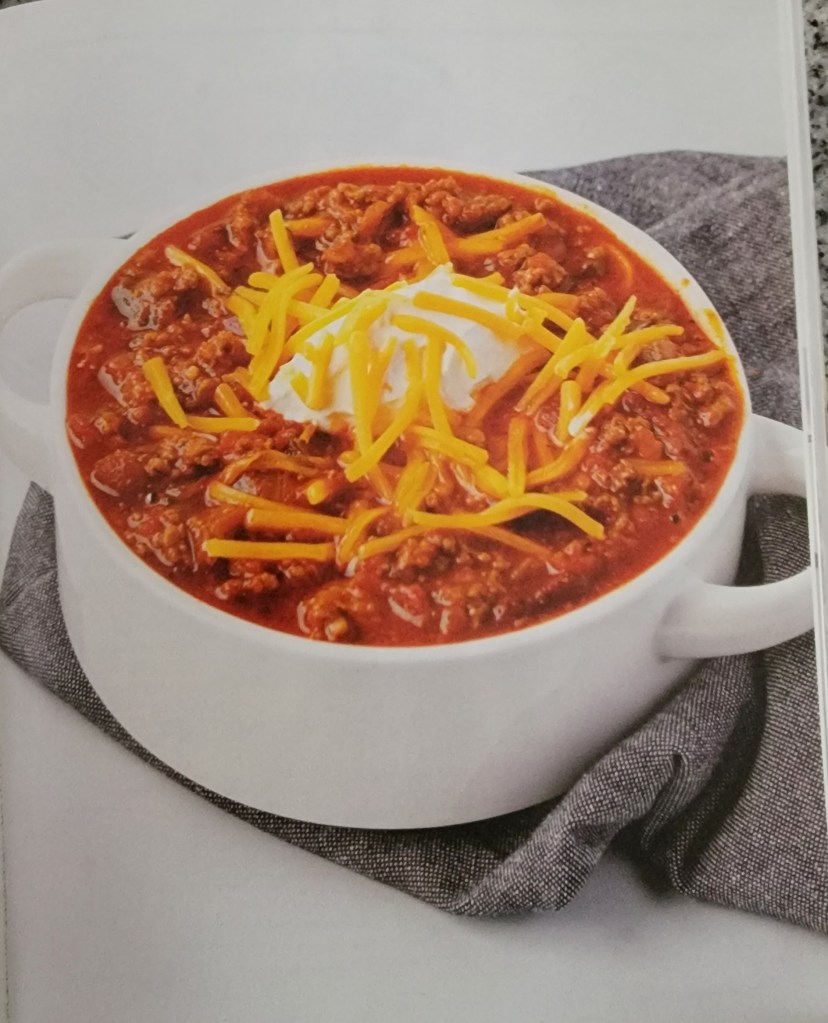
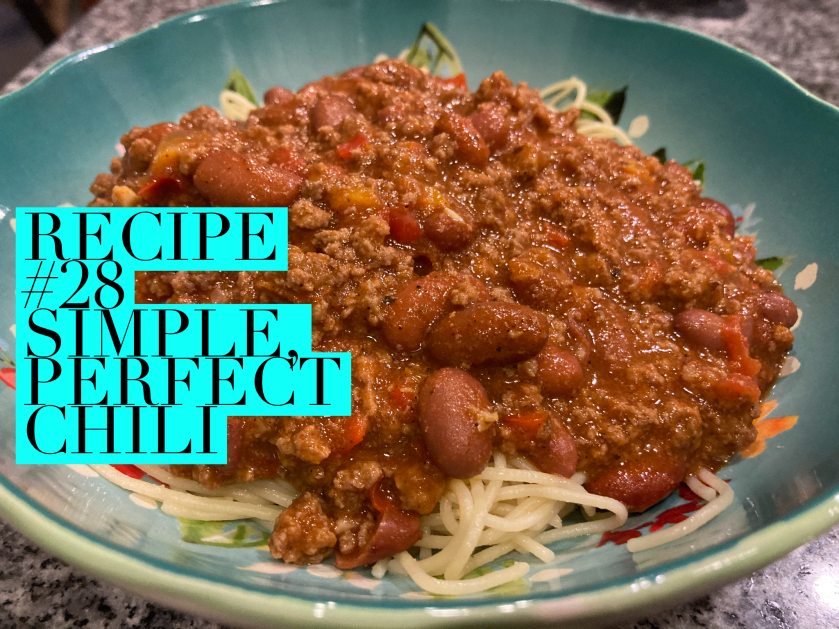
I am always inordinately pleased when my final product looks exactly like the picture in the book; it’s one of the reasons I disdain cookbooks that don’t feature full-on Playboy-quality food porn photos. The images should make your mouth water, am I right? Such was the case with Jeffrey’s Blue Ribbon Chili. Maybe I didn’t fill my bowl to the brim with the liquid for a photo op (since no one can actually eat it served that way!) but I guarantee my version looked spot-on, and I couldn’t wait to taste it. Particularly since I was convinced I had ruined the whole thing right out of the gate. Read on…

I decided to prepare this chili to serve on poker night hosted at our place, in part because at the time our good friends were staying with us and I had access to another excellent cook! There are 23 ingredients in this recipe, and I needed the extra hands to make it quicker to throw together (thank you Lisa!) The author claimed prep could be done in 15 minutes, but I call BS on that statement. That being said, there was nothing “difficult” about it, just a lot of chopping, spice measuring, and can opening. Speaking of chopping, that’s where I messed up royally, and thought the entire pot might be destined for the trash can. Or a warning label. The chili veggies included onion, garlic, poblano, jalapeño, and the coup de grace, a Scotch Bonnet or habanero pepper. The first time I used habanero my hands throbbed for four days, and I had only made a few slices. I learned my lesson, so this time I wore gloves as I carefully seeded and deveined the pepper, then diced it into bits, dumping the entire pile in to sauté along with the other peppers. Imagine my horror when I got to the very last line in the first instruction, “If you used it, remove the habanero and discard”. Oh. Crap… What unholy wrath of white-hot habanero oils had I unleashed into the unsuspecting pot?? There was no retrieving the minuscule pieces I had thoroughly incorporated into the mix, and I was devastated. During all the enthusiastic prep work, I failed to carefully read the very important line, “1 habanero, sliced in half, seeds removed”. I figured I would be eating cereal for dinner, given my particularly spice-averse palate. Hanging my head in shame, I carried on and completed the recipe, so I could share my humiliation with you, dear readers. You’re welcome. Once the pressure cooking was done, my sous-chef volunteered as sacrificial lamb…er…taste-tester…to see if it was acceptable, since she does like spicy food. Imagine my surprise when she proclaimed it both delicious and not spicy at all! Say what?!? Of course I had to try a bite regardless, based on my self-imposed rule of “always taste the recipe no matter what I think”. I figured at least she hadn’t spontaneously combusted, so that was a good sign. Relief (not tears!) flooded me when I tried a spoonful and did not immediately breathe fire. It was flavorful! It was comforting! It was EDIBLE!! That was really all I could ask for, but I got much, much more. So let this be a reassurance to you that you can’t really screw up Instant Pot recipes! 9/10 (for sneaking that habanero direction in there without writing it in 30-point font!)

Fully customizable mac and cheese. Maybe too customizable.

Soooo… Turns out you CAN screw up Instant Pot recipes! My mistake. Or at least, “my poor choices”. My sister made her IP Mac and Cheese the last time I visited, and it was fantastic. I’ve made my own IP version in the past, probably from some online recipe search, and it was fantastic. This… wasn’t. In fact most of it did end up in the trash, much to my chagrin. It looked good, it smelled good, and yes, it was identical to the centerfold… I mean, cookbook photo! But all was not right with the world. I think the problem was that I was given too many options, and I chose poorly for the tastes of my household. We are all big fans of blue box mac and cheese in my family, so you’d think sodium wasn’t much of a problem, despite what my blood pressure readings would have you believe. I actually don’t care for salty food, but those commercially processed products are so sneaky! I’ve never felt that Kraft makes an overly salty dish, even though it packs 710mg of sodium per cup of prepared yumminess, and I eat half the box at minimum! This recipe however, was unpleasantly salty. Let’s start at the beginning to see where it went off the rails…

Step one was “choose your noodle”, between macaroni (obvi), cavatappi, or cellentani. Well, I’d never heard of that third one, and I had a box of cavatappi at the ready, so I picked that. I shouldn’t have. Not for the salt issue, but because it didn’t seem to cook all the way through during the prescribed time of 6 minutes. It should be noted that I prefer my pasta cooked slightly over al dente, and this came out definitely under al dente. Not crunchy, but close enough to be annoying. Next error in judgment: “4 cups chicken broth or garlic broth (e.g. Garlic Better Than Bouillon)”. I have low-sodium chicken broth and I should have used it, but I fell under the spell of gaaaahhhhhlic. I love it, and usually that is a safe bet. However, I only recently found the directions for the ratio of water to bouillon base – on the lid, not the label; WHY?? – and I was a bit heavy handed. Strike two. Garlic can definitely read as salty or spicy (if raw), and I should have known better. Next was 4 cups of cheddar, followed by 1/4 cup Parmesan. Again, cheese is salty, but nevertheless I decided to “use up the whole thing” from the Parm container. Strike 3. By the grace of God I did not have any Boursin cheese in the fridge, or I would have dumped that in too and had a real disaster on my hands. I did toss in the (“optional”; see, there he goes, giving me enough rope to hang myself!) cream cheese (105 mg sodium), and the “optional” hot sauce (150 mg sodium) and dijon mustard (115 mg sodium). Typically homemade mac and cheese calls for mustard powder instead of prepared mustard. I think I found the reason! While this looked creamy, cheesy and amazing, I could only eat a small amount due to the saltiness, and the hubby ate a relatively small portion for him, then reported he didn’t feel that great later, so he refused to touch another bite. The daughter unit is typically teenager-picky and wanted the neon orange stuff she’s used to, so she wasn’t fan. Long story short, no one really liked it. This is a cautionary tale; I don’t believe the recipe is necessarily at fault, but I will try this again only with major edits and substitutions. I give my attempt a 4/10, but it has potential! Choose…wisely.

This recipe gets a solid “meh”.

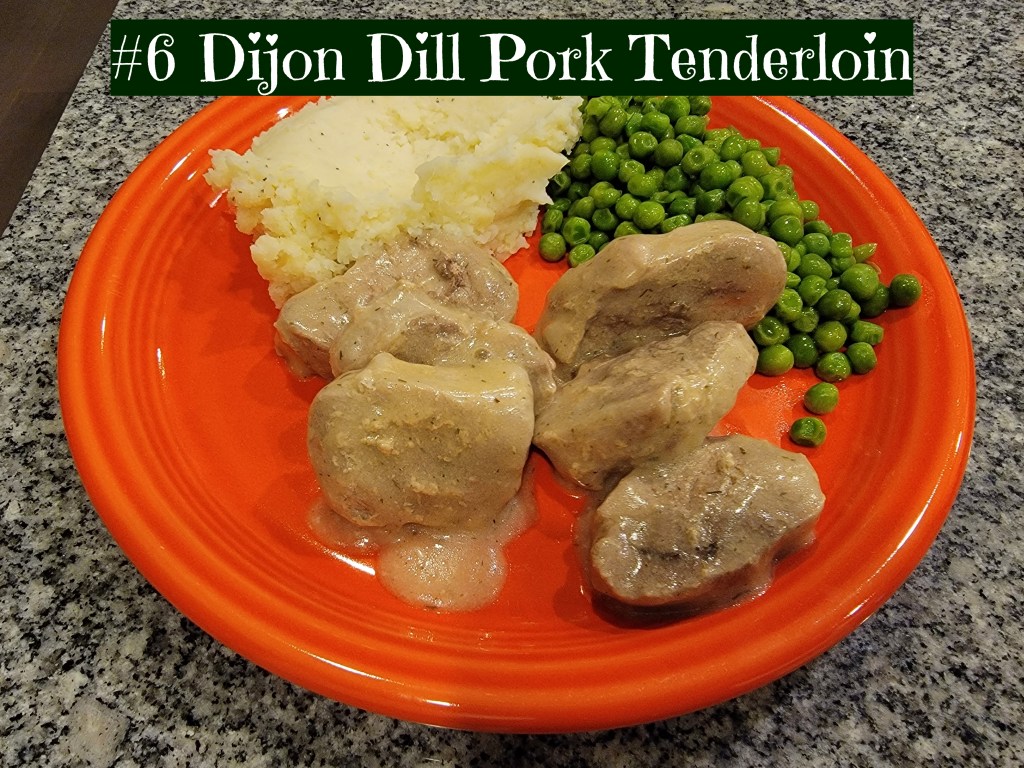
Sadly, I must concede that every recipe is not unicorns and rainbows. I mean, who wants to eat a unicorn anyway? But seriously, I was a little disappointed with Dijon Dill Pork Tenderloin, and I didn’t even dork it up! It started innocently enough; I had thawed pork tenderloins, and the index conveniently showed several entries for my main ingredient. Great! I can’t say mustard sauce is the first flavor profile I associate with pork, but I wasn’t against the idea. Traditionally I roast pork tenderloins whole in a stoneware pan, and it is always juicy and perfect. To my dismay, cooking it in the IP made it a bit tough. Maybe it was the 10-minute natural release time that pushed it past its peak tenderness? Maybe I should have seared the meat before poaching it in chicken broth? Whatever the issue, I didn’t think it was my best work. The dijon “sauce” was actually more akin to a “soup”. It made so much sauce… We poured it on the pork, we drowned the mashed potatoes in it, and I still dumped a lake of it in the trash after we all ate a portion plus had the leftovers. 6/10, for not quite nailing all a pork tenderloin can be.

Despite the less-than-stellar reviews of two-thirds of this week’s recipes, rest assured that you should still get an Instant Pot! I have continued to make and enjoy the vast majority of recipes from The Step-By-Step Instant Pot Cookbook, and I have every confidence I will find even more absolute winners. I’ll just be more wary whenever I see that dangerous word, “optional”!

Under Pressure…

Pressure on veggies, pressure on meats! Da da da… Ok, apologies to David Bowie and Queen for shamelessly riffing on their song, but I can’t ever pass up a good pun! After wrapping my second Pioneer Woman recipe collection several weeks ago, I put my next cooking project up to a vote; should I continue with another Ree Drummond book, the second Magnolia Table volume by Joanna Gaines, Good Eats Vol 2 by Alton Brown, or The Step-by-Step Instant Pot Cookbook by the decidedly NON-chef, Jeffrey Eisner. Color me surprised when the latter was the landslide winner among my esteemed voters (275 Facebook friends and acquaintances.) Those who weighed in were most interested in watching my trial by fire (or pressure, as the case may be) of learning to use my Instant Pot for more than just boiling eggs. P.S., if all you ever do is boil eggs in this thing, it’s still worth the investment!

The author is a home cook without professional training, so his recipes are novice-appropriate!

My main goals for writing this blog are three-fold: 1) Learn new recipes that I otherwise might never try; 2) Make observations and reviews of aforementioned recipes for future improvement, and/or complete deletion from my brain if they just don’t do it for me; and 3) To hopefully inform or teach others through my own stratospheric successes, abysmal failures, bloopers, and happy accidents. As a perpetual student of the culinary arts, I don’t discriminate between learning the most basic cooking methods and trends to the most classical approaches to high-end cuisine. I want to know it ALL. Which brings me to the star of my current project book, the Instant Pot. Or Insta-Pot. Or simply “the IP” as those in the many Facebook groups dedicated to pressure-cookery recipe sharing affectionately call this modern marvel of kitchen technology. I say “modern” as a bit of a joke, because the first pressure cooker was actually invented in 1689. It became popular for household cooking in the early 20th century, due to its ability to cook foods up to 90% faster than traditional stovetop or oven methods! However, old pressure cookers also had a tendency explode, spewing liquid-hot magma all over the kitchen and the cooks… which is pretty much my worst kitchen fear. I don’t seem to be alone in this, since many of my voters expressed the desire to learn how to properly use their IP because they are afraid of the thing. Can I get an amen?

My set-up: IP Luxe 6-Qt cooker, which came with two spoons and a lifting rack (front right of pot). Additional items are the Pampered Chef egg boiling rack and a set of two baskets.
Cat sold separately!

I purchased my 6-qt IP at the tail-end of the multi-cooker craze which occurred around 2017. As with most folks who snapped up one of these on Amazon Prime Day or were gifted an IP during the holidays, mine spent a good deal of time gathering dust, still inside the box. It was big. It was bulky. It scared the poop out of me. I’d previously owned a lower-quality, manual, Bed Bath and Beyond pressure cooker that I used precisely one time to create Alton Brown’s Beef & Barley soup (which by the way is absolutely delicious), and I kid you not, after releasing the pressure with a long handled wooden spoon, I bounded out of the kitchen with the swiftness of a jackrabbit on a date. The screeching, spitting hiss of steam escaping is the stuff of nightmares. Afterward that old pressure cooker lived a solitary existence in a dark cabinet until I Marie Kondo’d it away as something that did not “spark joy”. So why the heck did I sign up for more of this torture by buying an IP years later? Peer…pressure. Ok, I wasn’t even trying for a pun that time, it just happened! And it’s true; one of my closest friends had purchased an IP and extolled its virtues several times, eventually purchasing multiples so she could have one for human food preparation and additional ones to make healthy, homemade pet foods for her four lucky fur-babies. Prodded by her example and many, many recipe web searches, I finally used my IP to make rice and chicken (fairly successfully) months after I purchased it. Over the intervening years, I learned how to use it to make the PERFECT hard boiled eggs, and even more complicated things like tender pork spare ribs and a couple stews and pasta dishes. The Instant Pot never gained status as my go-to method of cooking, but it earned a respectable spot on my appliance shelf and got to come out to play dozens of times per year. I give you this brief personal history simply to illustrate my own experience level as I launch into the recipes from The Step-by-Step Instant Pot Cookbook.

I cheated. Or rather, I took an “optional” shortcut and ran with it, but the result was a success!

Finally, what you have all been waiting for: the food! I numbered these photos wrong and it’s a hassle to fix it now, so let’s just pretend the first thing I made was Swedish Meatballs. When I prepared this, I was in the same boat as many families these days: hungry, with very little time available for cooking a real dinner. With the siren song of take-out ringing in my ears, I drowned the music out by using a huge time saver in the form of frozen Italian meatballs. My good buddy Jeff (the author) says that’s totally fine, and assured me the cook time would remain the same, so I skipped the IKEA-inspired meatballs that include no fewer than thirteen ingredients. I’m sure they are delicious, and I’m sure at some point I’ll make those. Today is not that day. The meatballs utilized the little foldable lifting rack that comes standard as part of the IP starter kit, and called for 10 minutes of cooking followed by 5 minutes NR, then QR (more on this momentarily.) The function of the rack is to keep food directly off the surface of the pot and let liquid (and therefore, steam) cook the it. Often water is the base used to create steam, but this recipe calls for beef broth, which is later used to make the gravy. One of the first things a new user learns is the pressure-cooking community lingo, such as “QR” and “NR”, which stand for Quick Release and Natural Release, respectively. The first means you’ll want to grab that long handled wooden spoon to flip the pressure gauge open after manually cooking for a prescribed time. Don’t do this with your fingers, because you risk a nasty steam burn if you aren’t quick enough snatching your hand back. Natural Release is a kinder, gentler form of letting the steam out by allowing the internal temperature to come down a bit before flipping that valve open. After 5-10 minutes, the pot only gasps, rather than screaming the sound of a dying goat. I cannot overstate how startling and nerve-wracking the cooking noises are to a novice using the IP. Trust me when I tell you they are normal and means you have done everything right! Back to this recipe; meatballs – good, sauce – good (you use gravy mix, heavy cream, and corn starch, so no great mystery there) but the one disappointment I had is that I had to dirty a second pot to boil my noodles. I prefer my IP recipes to be true “One Pot Wonders”. This gets 8 out of 10 for ease of use and tastiness.

The REAL first recipe was a unanimous hit!

One of the best things about the arrangement of this cookbook is that it was created by a REAL PERSON. Not a professional chef; not a culinary school instructor; not your Great-Grandma Gertrude whose recipes included things like Oleo or arrowroot. If I open my fridge and find a surplus of lackluster carrots, I can look up “carrot” in the index and find seven ideas to use them up. If I know I am in the mood for a hearty stew, there is a chapter dedicated to just that. Literally anything I have on-hand I have been able to find a recipe to utilize it in this book. For my (real) first foray into this project I had a pile of chicken that I had thawed without anything inspiring in mind. Enter Chicken and Dumplings. Now, I have eaten this simple meal on several occasions. I’ve had versions I didn’t much care for with somewhat slimy dumplings, and versions which called for store-bought biscuits to be cut into chunks to serve as dumplings. Never before had I actually MADE a dumpling. I didn’t even really know what it was! No great surprise, it’s basically a biscuit, though somewhat flatter and almost looked like pie dough, but once it was dropped into the simmering stew of celery, carrots, onions and chicken, they puffed up nicely. Between the delicious mix of spices and the comforting doughy goodness, this recipe was a hands-down winner for everyone who tried it. On the plus side it makes your house smell amazing too! 9 out of 10 for this recipe; the only thing docking it is that it does take an hour, all told, and you make a bit of a mess rolling the dumpling dough.

Ahh, one of my husband’s faves: Spaghetti Carbonara. This is a frequent restaurant order when we go out, and I have tested out a couple different versions at home over the years. All have been decent, none have become “my” recipe. This one is a contender. In the picture it was hard to capture the essence of this dish, which was creamy, tender, and altogether satisfying. It started out by using the “Sauté” button on the IP as opposed to the most oft-used button, “Manual or Pressure Cook” (only used when the lid is on.) When the pot was screaming hot with olive oil, I added nearly a pound of bacon, far more economical than an equal amount of pancetta. Once crispy, I removed the bacon and sautéed onions and garlic in the drippings, before pouring in some white wine (or chicken broth) to deglaze the yummy bits sticking to the pan. Then in went dry pasta, broken in half to fit beneath the surface of the liquid. Slap on the lid, cook for eight minutes, and by the time you QR the steam, it’s time to add in a mixture of eggs, Parmesan and salt along with butter and cream. Are your arteries hardening yet? Don’t worry, surely there is an Instant Pot Salad in here somewhere… No? Oh well, make this a splurge meal, and if it makes you feel better, do like I did and throw in some token frozen peas to at least get a green vegetable in there. You won’t regret it! 10 out of 10, for bacon!

That’s A Wrap!

Hear ye, hear ye! It is time for that bittersweet denouement, the grand finale of 63 rounds in the kitchen with the recipes of Ree Drummond’s inaugural recipe collection, The Pioneer Woman Cooks. As her seventh cookbook just released last week (ahem…pay attention, folks who need Christmas gift-ideas!) this is a great time to come full circle. I have now completed the Alpha; I can’t wait to start on the Omega! But first, let’s discuss how the end went down…

Messy, but WORTH IT!

Anyone who regularly reads this blog knows all about my general disdain for the painful (sometimes literally) task of Dutch oven frying. It spits, it splatters, it pops, and it covers every surface within a hundred meters in a greasy, sticky residue. The floor in front of my stove becomes a hazardous waste danger zone as the hardwood gradually becomes slick with hot oil droplets. You’d find better footing on a freshly dressed bowling lane. Recipe # 61: Onion Strings was no exception, but I will firmly give it a pass. They were AMAZING.
I have made French fries. I have made chicken wings. I have (attempted) to make donuts. I have made crab wontons. Everything, and I mean everything, pales in comparison to how great this incredibly simple dish tasted and how quickly it disappeared. Its simplicity gave me a false sense of “meh” when I read the ingredient list: buttermilk, onion, flour, salt, cayenne pepper, black pepper. And of course a freaking gallon of canola oil. It really sounds kind of dull, right? But prepare to be amazed folks; if you mix these ingredients together and deep fry to golden brown, you will have a hit on your hands! The buttermilk and seasoned flour coating was exactly right to balance the sweetness of the thinly sliced onions, and sprinkling salt on just after they emerge from the fryer is clutch. In those few seconds while the oil is still hot and before the last bit soaks into the strings, the flavor magically pulls into the onion and the result is HEAVENLY. It is worth noting that these take only minutes to cook (as in, 1-2). The problem is that you can eat an awful lot of fresh onion strings in that 1-2 minutes, so you have to keep your production equal to how many you skim off the top before your family gets any!

Another candidate for “Smell-evision” if that ever becomes a thing!

Burgundy Mushrooms. So many pre-conceived ideas. All of them wrong.
I’ll start with the wine. I don’t like red wine, never have, never will. In Ree’s own words from her description of the dish, “If you’re not a fan of wine, steer clear of these – they use a whole liter!” See?? Even she was warning me off. But then again, she doesn’t know my commitment to the process, so I forged ahead, undaunted. We happen to have a ton of red wine, since my new husband (formerly known as “The Other Half”, now known as… “The Other Half With a Ring”) adores the stuff, but we had no Burgundy in the house. I still managed to pick the perfect red to make these mushrooms; it was the one that was already open! No, I have no idea what kind was. Dry? Maybe. Full-bodied? Sure, why not. Earthy with subtle leather overtones? Whatever you say, red wine people! There was enough left in the bottle to make this recipe, that’s all I needed to know. To tell you how little faith I had in the yum-factor of these mushrooms, I decided to only buy half as much as the instructions called for. I also eschewed white button mushrooms for the meatier and far superior (in my opinion) baby bella mushrooms. I wanted to do as little work as possible with these, so I bought the pre-sliced container. Game changer! The rest of the steps were as simple as 1. Unwrap stick of butter 2. Dump on red wine 3. Add spices and bouillon cubes 4. Stick a lid on and walk away to do other projects. I admit step 4 caught me off guard; thank goodness I happened to make this dish early in the day! Since I don’t learn, and yet again forgot to read the recipe all the way through, I failed to note that it needed to simmer for SIX HOURS. Did I say six? Make that NINE. At six hours all you do is remove the lid, then let it cook and reduce for an additional three hours. All the while, I was left wondering how it could possibly take more time to prepare a veggie side dish than it would to cook a 30-pound turkey, but also how something like fungi soaked in a beverage I hate could smell so DIVINE! And boy, did it ever! Back when I was younger and more naive, say, about 8:00 AM on the day I cooked Burgundy Mushrooms, I had thought I wouldn’t really want to eat the aforementioned item as a stand-alone veggie. In my misguided haste, I decided to make French onion soup and add the mushrooms to the broth to make it heartier. Don’t get me wrong; it was a great use for these mushrooms, and the soup was improved by their presence. But I have to admit that I would have been thrilled to eat these atop a steak, or just alongside any meal. Red wine bath and all!

Murphy’s Law of the Kitchen: If you forget an ingredient, it will be the ONE thing you need most!

And here we are, friends! The final act of this play, the very last recipe. Fittingly, it was a dessert, the perfect sweet ending to my 10-month project. Granted, it was a dessert that I don’t find very inspiring, which is also why it managed to wait until last. Recipe #63: Angel Sugar Cookies, just sounded so blah, as do all sugar cookies. That’s not to say a sugar cookie with a good frosting can’t be delicious, but frosting was not even a suggested variation here. Sigh… What happened next was probably karma for going into the kitchen with a lousy attitude. Serves me right! I tried to whip these up during a break in my work day, just combining the dry ingredients with the oil, butter, and eggs and throwing the mixture into the fridge to set up until the evening when I planned to bring the cookies to a party. Silly, silly girl… When I pulled the chilled bowl out of the refrigerator a few hours later I noticed it didn’t look like much “setting” had occurred, and the batter (I couldn’t justify calling it a dough) more closely resembled lemon curd than a cookie base. I got my handy-dandy scooper out and proceeded to try to drop “dough” balls onto the cookie sheet. I looked at the picture in the cookbook. I looked at what I was producing. I read the recipe for a third time. Yes, this is where it gets very embarrassing! I READ IT THREE TIMES!!! Ree’s dough balls were so much different than mine, but I convinced myself it was because the butter I had used at room temperature (as directed) was just overly warm, owing to the fact that it had been unseasonably hot in the house, and it went from “softened” to “half melted” right on the counter top. But wait, it gets worse. I’m in the habit of singing, dancing, conversing with any of my four cats – or yelling at them to get off the counter – and yes, talking to myself while making a recipe. I actually said out loud to myself, “This is stupid; there’s nothing to bind it together! I can’t believe there isn’t any flour in this dang recipe! I can’t even see how this will work.” Oh, I assure you… it did NOT work! I was feeling skittish about the prospects of success, so I decided to bake them on the lower end of the cook time, and came back to check them before the timer went off when a funny smell filled the house. And smoke. Lots and lots of smoke. Of which I had no warning.

**PSA** Make sure when the stupid smoke detectors go off with that ungodly chirping at 3 AM, that you remember to put batteries back in the next day!

I sprinted to the oven and got the pan out in time to prevent actual flames, but it was an epic disaster nonetheless. As you can see from the picture above, my cookies were golden brown and…liquid. I felt like a beloved pet had bitten my hand; why would Ree do this to me?? I trusted her! Then, alas, I saw what I had missed on three previous read-throughs. Namely, FOUR CUPS of flour (plus two tablespoons!) Seriously?! I even knew it should be there, yet I managed to gloss over that key step multiple times. But, experience is the best teacher, and bad experiences are even better than most for that purpose. I decided that I wasn’t going to let that calamity be my last recipe from this book. I dumped two cups of flour into what remained of the batter, crossing my fingers for a cookie miracle. And my wish was granted! We may have only gotten just shy of a dozen Angel Sugar Cookies in the end, but the hubby said they were fantastic, and I even voluntarily ate a whole one. Okay, it was two. Ree, you are forgiven. Even though it was my mistake. All is right with the world again!

Redemption cookies!

Vacation Victuals

Ahhh, vacation… A time to kick back, relax, perhaps have a few drinks and enjoy some sun and maybe a good book. Or, if you are me, a time to spend countless hours at a casino poker table and to cram in the last few recipes from Ree Drummond’s “The Pioneer Woman Cooks” with your sister in your spare time! When we planned my last visit to sunny San Diego in August (at least I heard it was sunny; I didn’t notice since I was, as previously mentioned, ensconced at a poker table!) my sis generously volunteered to purchase the ingredients to make the last six recipes. It’s possible she didn’t realize quite how generous an offer it was at the time, although when I told her these recipes called for a metric ton of beef, she still followed through! Eventually… We chatted a few days before I arrived to go over the shopping list and prep times for the meat, and she promised to grab the groceries that day so we could start off vacation in the kitchen together. Fast forward a week when she picks me up at the airport and announces, “We have to stop to the grocery store; I haven’t been shopping yet!” Sigh… (To be fair, she works 24/7, so I wasn’t overly surprised!) This put a slight kink in the plans, as I thought the brisket had already been swimming in its 24-48 hour marinade bath, but we made adjustments. Not the least of which was ditching the 7-pound suggested weight for Roasted Beef Tenderloin (roughly $200) in favor of the “value priced and with-attached-coupon” packages of filet mignon. I used the same strategy when preparing the Magnolia Table (Joanna Gaines) recipe last year since I neither reside in bovine-rich Texas nor live on a working cattle ranch with cows literally tromping through my front yard.  For the rest of us, beef prices are astronomical! But I digress… A filet mignon is essentially the same cut as a tenderloin, just already sliced, so we used the tried and true temperature check method rather than using the timeline in the recipe. Meat this good does NOT require much in the way of cooking or seasoning; salt and pepper (oddly, also a small amount of sugar) and just a few minutes at 450 degrees produced these perfectly mid-rare steaks. Recipe #59 marked off the list!


Recipe # 60 was another story. The best laid plans so often go awry, and there has never in recorded history been a vacation schedule that goes exactly as written anyway. We had every intention of making a mushroom side dish (one of the remaining recipes to knock out) to use as a steak topper, but as you may notice from the picture above, we ended up with a can of green beans. For the Braised Beef Brisket recipe below, we fully intended to make fried onion strings on the side, yet another straggler recipe. Guess what? Didn’t happen! I think we ended up shredding this ridiculously tender beef with two forks (or maybe we just blew on it, as it practically fell apart at the slightest provocation!) and piling it on buns with barbecue sauce. If you have a lot of hungry mouths to feed, I’d recommend this dish based on ease of prep (dump soy sauce and lemon juice into a pan along with a ton of chopped garlic, and let the acid do its thing to break down the beef fibers) and ease of cooking (stick it in the oven and forget about it for half a day.) You can’t mess it up! Plus it tasted pretty darn good!

After so much cholesterol, we decided to take a break and instead focus on too much sugar! Like, way, waaaaay too much sugar. With all due respect to Patsy, her Blackberry Cobbler was diabetes waiting to happen. Just look at the photo below: an actual sugar crust formed on top while this baked. As a point of reference, the ratio of sugar to flour was 1.35:1. That’s insane. As a kid I would have been all over this, but it was too much for me these days! As a variation, we swapped out blackberries (which I don’t especially like due to the seed situation) for blueberries. They tasted good, but I am unsure if the moisture content contributed to the cobbler being quite loose, or if any fruit would have yielded similar results. Other suggestions were peaches or raspberries, but I think I’ll stick with Ree’s previously discussed Peach Crisp, which was as close to flawless as you can get, except of course for not being crisp in any sense of the word. But I digress yet again! We ended up baking this a bit longer than suggested in order to get the browning achieved here, making those edges caramelly and sticky. Frankly that was delicious, but the principle here was that it contained too much sugar for anyone to finish a whole piece.

Ok, so my niece had two pieces…

Trigger Warning: This Blog May Ruin Your Diet!

With a mere three weeks to go until I officially become “Mrs. Other Half”, I have thrown caution (and calories) to the wind. For months I worked at increasing my water intake, exercising more, and (gasp!) actually lowering my food consumption to try and get into decent shape before the big day. Well guess what? I’m as good as I’m gonna get, and he loves me even if I don’t maintain a size 2. Not that I achieved a size 2… but you catch my drift! The last thing I need during these stressful final few weeks of planning is to starve myself, and boy howdy, did I avoid that in style! Allow me to introduce you to a few of the more calorie-dense offerings from The Pioneer Woman Cooks

For some reason #53: Creamy Rosemary Potatoes, a.k.a. scalloped potatoes in any civilized nation, took me an extraordinarily long time to put into my dinner rotation. In my mind it was going to be a time consuming dish that wasn’t all that interesting. Sometimes I can be dumb. My biggest hangup was about slicing the potatoes thin, a process that took a grand total of three tubers and about three minutes to make a generous portion. If I had cut them by hand, of course it would have taken much longer and been far less consistent, but with the use of a mandoline slicer, I knocked it out in no time. The filling could have been more complex, but it wasn’t really a detriment; mostly just cream and spices and frankly I’m not complaining. I think technically I was supposed to use whole milk, but I had an expiration situation, so heavy cream was the winner! Combined with tons of shredded cheese and both rosemary and chives from my garden, I whipped this whole thing together in just a couple minutes, then baked for less than an hour. Like the title suggests, creamy, potatoe-y goodness ensued!

Much as I love my husband-to-be, sometimes the man is just plain wrong. Take olives for example. He thinks all varieties are gross! Silly boy… For that reason #54: Olive Cheese Bread had to wait for just the right time when I was going to be home alone and not have to defend my meal. This recipe is precisely what it says, nothing more and nothing less, with the exception of the softened butter and mayonnaise which served the purpose of a medium to make the chopped olives spreadable. Now, as this project winds to a close, I have decided I will not endure icky ingredients in what I make for myself as long as the “spirit” of the recipe is honored. Green olives stuffed with pimentos sits firmly in that category! I used black olives only (clearly the superior choice!), and I may have also included some crushed garlic cloves. This bread was absolutely delicious, and I will admit I didn’t have really high expectations for it. I ate the entire half-loaf over the course of a couple days as my breakfast (don’t judge), and I have discovered the air fryer does a masterful job of reheating and de-sogging the leftovers! A brilliant thing about this recipe is that I was able to save the other half of the bread in the freezer with the spread already on it by wrapping it in cling wrap and aluminum foil. It will be ready to bust out the next time I have a weekend alone with no one to make faces at my olives!

Once in a while I am blown away by something I expect to hate, or at the very least feel ambivalent about. Making #55: Peach Crisp with Maple Cream Sauce was just such a time. I’ve never cared for a crisp, a crumble, a cobbler, a buckle, you name it. It’s all basically the same thing, and none are the best dessert on the menu in my opinion. I’d also like to point out that the word “crisp” has absolutely no place in this description, and should be removed immediately as false advertising. The texture was moosh, moosh, moosh, and I wouldn’t have gotten it to crisp even if I’d left it in the oven for another hour. Regardless of the less than inspiring mouth-feel, this peach dessert was 100% a winner! Part of it may be that I live in Colorado with their world-famus Palisade peaches, which I sliced fresh instead of using frozen store-bought fruit. Another factor may be the equal ratio of flour to sugars (both white and brown), mixed with warm pie spices like cinnamon and nutmeg. Whatever the nature of the alchemy, all this combined to make an astoundingly hot (molten lava has been known to retain less heat), sweet, fruity melange that paired perfectly with the maple cream sauce, prepared earlier in the day by stirring light corn syrup and maple syrup into warm heavy cream. Since my only problem with this dish was lack of anything to actually chew, when I make it again (not IF), I will perhaps double the amount of crumble in order to deal with the excessive juices produce my Colorado native peaches. Oh, and by the way, you’re gonna want to make extra of that cream sauce and add it to everything you eat!

At long last… a Sangria recipe I can get behind! I have long held the opinion that sangria is supposed to look refreshing and delicious and I am supposed to want to drink it while having a carefree dinner party with my fabulous friends on my sun-drenched lanai. However, the first time I actually tried it, it was bitter and unpleasant, despite a whole fruit salad dumped into the pitcher. Ok, so technically I didn’t actually make the recipe as described in Ree’s book, but I did finally figure out how to adjust to make it palatable for those of us sweet wine drinkers! I was pleased to start with the colorful mix of chopped fruit as a base for the lovely concoction I planned to serve to real-life fabulous book club friends on my real-life sun-drenched back patio. Apples, strawberries, grapes, lemons, lime, and pineapples all took a bath in my liquors of choice, lending their own natural sweetness to the overall flavor. What liquors you ask? Well… seemed like all of them! Ree called for a bottle of dry white wine like Chardonnay; nah, I used regular moscato. She also used a bottle of yucky, bitter, tannin-y red wine (I may be editorializing here) such as Cabernet Sauvignon. I decided to use rosé moscato, which I didn’t know existed but am now pleased to have in my repertoire. Finally, I added an additional cup of citrus rum (I used lime) and a cup of citrus vodka (I used lemon). I feel I showed considerable restraint by NOT using the extra cup of sugar the recipe called for, since my wines were plenty full of sugar already! The end result was mildly sweet (not syrupy the way I was afraid I might have tipped it) and gently effervescent, owing to the bubbly moscato. The only caution here was regarding how actually refreshing and delicious this was, leading to the misguided notion that one could down a whole tumbler-full and still remain standing. It may need to come with a warning label, but nonetheless I have found my go-to sangria!

Failure, Thine Name is Apple Pie

Normally this blog is full of all the wonderful things I whip up in my kitchen on the regular; delectable treats and meals that I hope make readers hungry, inspire them to cook at home more, or to do one better and improve upon the recipes! This is not that blog. Every once in awhile I hit a major cooking slump where nothing quite turns out right. I don’t know if Jupiter was in retrograde or there were active sun flares, or if I was only reading every third line of the recipe, but this blog is full of failure after failure. Grab a cocktail, this is gonna be rough!

A rare sighting of the chef at work! Photo credit: Lisa “The Sous Chef” M.!

Let’s start with the most recent disaster, shall we? I am down to a grand total of SIX recipes remaining in The Pioneer Woman Cooks, so as you can imagine, I’m at the point of “I don’t really have much interest in these recipes.” For some it’s the expense (beef tenderloin), for some it’s the food itself is unappealing (sugar cookies – booooooringggg), for recipe #57: Cinnamon Rolls, it was the mess and time commitment. Plus I already have a fool-proof (or at least ME-proof) recipe that is successful 100% of the time, so why mess with perfection? Because I am incapable of walking away from a challenge, that’s why, so new cinnamon roll recipe, here I come! Ok, first thing you need to know is this recipe makes FIFTY rolls. That’s 5-0. Seriously, no one needs that! I thought perhaps they were mini, but nope, they are pretty full-sized! Mine were even bigger…more on that later. Next; in the “pro” column is the fact that this called for FAR less yeast-rising time than my go-to recipe, which demands a full two days of proper preparation for the various rises. (Another reason I dragged my feet to make this.) Also in the “con” column: this required far less yeast-rising time! They had an hour to rise after the initial dough mixing, but I’m used to a big, beautiful puffball of dough which I joyfully punch down, but this never quite achieved those heights. There was a secondary rising of about twenty minutes after it was rolled, but that didn’t amount to much either. Another “con”, this dough was S-T-I-C-K-Y! I had to add a lot more flour to keep it together and from gluing to my hands and roller, and it already called for nine cups! My tried and true recipe? Not a problem. I can pretend I’m Chef Boy-R-Dee and flip that dough through the air like a pizza round if I wanted, because it is nicely cohesive. How about another positive? There was a metric ton of cinnamon and sugar and butter for the filling! Make that a partial positive… the first batch called for so much butter it actually made a mini-flood on the counter which had to be cleaned, so that’s annoying. Now here is where the fault is likely mine, not to be blamed on the recipe. I may or may not have adhered to the 1 1/2 inch slicing size, based on my desire to keep the total down to no more than a couple dozen total rolls. While they filled the pan nicely and looked beautiful out of the oven, the center roll was a gooey, uncooked mess that I gladly tossed in the trash. The baked parts of the rolls (and the delectable icing!) were quite delicious, but the undercooked parts were awful. Long story short, I’m sticking with my recipe which works! (Oh, and I have two more pans of frozen dough which I will bake at least ten minutes longer next time I try!)

,Speaking of undercooked… I was actually looking forward to #41: Huevos Hyacinth, so named for Ree’s BFF, but when it finally happened I could barely choke it down. The problem here is likely that I went overboard with my favorite ingredients, a frequent issue of mine. The premise for these eggs is simple: meat (such as deli ham or turkey), tomatoes or salsa, an egg, then top with cheese, season, and bake. I was excited to get to pull out my adorable tiny cast iron skillets (the picture doesn’t indicate, but these are about four inches across) which had never been used, AND I was getting the bonus of using up the last of the lunch meat and sliced ‘maters from the fridge. I love a good use for odds and ends in the crisper drawer! The recipe went south (my fault) when I used TWO eggs instead of one, a rather excessive amount of tomato (which is 99% water – don’t fact-check me, just go with it!), and I topped it with too much cheese. Too much cheese?? Is that even possible?! In a word, yes. Due to the high water content and the additional egg, I needed less cheese on top in order to get the whites fully cooked. Better yet, I could have just cooked the eggs cheese-less first, then when they were mostly done, added it at the end. Sadly this is Monday morning quarterbacking, and I didn’t do those things. My cheese was starting to blacken, so I had to take it out of the oven before the eggs were even poached. Another one for the “Fail” category, but I’m willing to give this another shot with some adjustments!

Ugh… Yet another meatloaf! Why does every cookbook author feel the need to include this?? I just don’t really care whose recipe it is, #42: Meatloaf will never be a favorite. This one had good flavor; it was wrapped in bacon (yay for taste, boo for inevitably floppy bacon.) It had a sweet, ketchup-based sauce brushed on during and after baking, so that tasted fine but also contributed to the aforementioned bacon-flop. Additionally, there was an abnormally large quantity of liquid in this recipe! A full cup of milk PLUS four beaten eggs and the meat/bread crumb mixture didn’t stand a chance of holding together properly. To be fair, I compared my result with the picture from the cookbook, and hers is also only roughly loaf-shaped and mostly resembles a melting log of dough. I don’t think I used too much; I think the recipe calls for too much. ‘Nuff said, I’m not making this again!

This will teach me to use an inferior pan!!

The final humiliation… #44: Flat Apple Pie. Ohhhhh, was I TICKED when I pulled this from the oven!! Finally, I can blame sub-standard equipment for my screw-up, instead of faulting the recipe or my own errors. I don’t much like apple pie or apple desserts in general, but this was actually looking and smelling pretty good as I mixed the warm spices and the juicy, tart apples together with sweet brown sugar. I dutifully filled a (store-bought) crust with my filling and folded the edges up around the apples for a galette-style dessert. I placed it in the oven and went to get ready for a Mother’s Day celebration, where this was to be served. Yeah; it had the nerve to go awry on MOTHER’S DAY! When the timer went off I opened the oven door to find… dry apples and what looked like the contents of the La Brea Tar Pits flooding one side of the pan. The stupid, cheap, crappy sheet pan I baked it on had buckled when it heated up, and the entire quantity of wet filling slowly leaked out and solidified into a blackened mess unfit for human consumption. I have no idea how this imposter pan made it into my kitchen which is stocked with Pampered Chef, well-made, quality cookware, but rest assured no one will ever find the body of THIS pan again! Needless to say, Mother’s Day dessert came from a bakery instead.

With any luck these are the worst of the worst from an otherwise much-loved cookbook. So the next time your soufflé falls flat or your Mac and cheese gums up…blame it on Jupiter in retrograde and order a pizza!

Vacation Blog: Take 2!

Is there anything better than cream and sugar gently cooked together? YES! It’s cream and sugar and freshly scraped vanilla bean AND EGG YOLKS cooked gently together, then topped with yet more caramelized sugar!! Wanna know what’s even better than that? Adding coffee extract to the sweet melange, and then topping the custard with not just sugar, but salted caramel turbinado sugar!! Swoon… Not only is #35 Creme Brûlée one of the most delicious desserts ever created (plus it allows me to use those cool little French accent marks!) it is eminently open to interpretation. The Pioneer Woman stopped at just plain old vanilla, probably because her husband would have had a stroke if she dared introduce flavors like “pomegranate” or “blood orange” to his dinner table that early in their marriage. My Other Half however, is going into our wedding knowing full-well there could literally be anything served on his plate at any given time, and I’m not even telling him what’s in it if I think he’ll fuss! There were no complaints to be heard with this scrumptious dessert, which was smoother and creamier than almost any I have been served in a restaurant, and surely more flavorful. Often the jury is out on whether it’s better to use an extract or the real thing when flavoring a dessert. Just watch any baking show and observe the look of sheer disgust on a judge’s face when they ask, “Did you use peppermint extract in this frosting?”, while the blood drains from some poor contestant’s face who didn’t steep fresh peppermint leaves in sugar water to create their own simple syrup from scratch. Well, I’m no Gordon Ramsay so I’m not that fussy, but I also have a solid reason to stand behind my choice. I considered adding strong coffee or even a shot of espresso made from boiling water and espresso powder to my custard as it was cooking to get the taste I wanted, but when cooking with fats like egg yolks and heavy cream, it’s risky adding too much other liquid. I didn’t want to potentially “break” the silky texture I had going on (making it grainy or resist setting up) or have the thinner liquid “cook out” of the custard and ooze onto the surface in a puddle. The simple addition of a dropper-full of coffee extract did the trick, lending a faintly brown color and gentle hint of java. You never want your creme brûlée to smack you in the face with a dominant flavor; this is all about subtlety! For the topping, it’s often recommended to use superfine sugar (also achieved by putting regular table sugar in a food processor and pulverizing it for a few seconds) because it will burn and melt fairly evenly with a kitchen torch. I prefer the torch method to the broiler any day, because, come on, it’s a flame thrower for food! I was going for the dessert equivalent of a Starbucks Salted Caramel Mocha, so the specialty turbinado (just unprocessed raw) sugar I’d purchased from a local spice store was the perfect accompaniment. One warning: while sugar melts under a torch, salt tends to actually catch fire and pop! I avoided any major injuries and learned to keep my skin covered while torching, and the resultant salt-laced sweetness over the coffee cream was sheer bliss. This recipe is flawless, and you can take it any direction you want for taste, so this one gets a 10 out of 10 from our household! 

I may have waxed poetic about the creme brûlée, but truly, it deserved sonnets written about it! Another personal favorite food of mine is #36 Fried Chicken, but I will try to be more succinct with this description! The first thing you need to know is that Ree Drummond does not like fried chicken. I’mma let that sink in for a minute… What self-respecting, ranch-dwelling human doesn’t like fried chicken?!? But it’s ok, I can forgive her. (Reference the above dessert if you have questions why.) Nonetheless, since she is literally the only inhabitant of Drummond Ranch who doesn’t like it, she learned to cook it anyway, since the nearest KFC is an hour away and her hubby and kids clamor for it regularly. For some reason unknown to me, I had a real hankering for chicken and waffles during the week this recipe was planned, though I’d only ever eaten this combo one other time. Normally I’d stick with the traditional mashed potatoes and gravy, but the siren song of the waffle won out. Not enough that I made scratch waffles, but Eggo’s turned out to be surprisingly good! There is nothing groundbreaking in her recipe flavors, so I’ll leave it at “flour seasoned with typical spices”, but her most unique step is adding buttermilk to the dry ingredients. Normally you just soak the chicken in buttermilk the day before you plan to cook it, and that is the limit of the “wet” step. By adding a small amount of liquid to the large amount of flour, you end up with a pebbly coating that resembles pie crust or biscuit dough when you rub in the cold butter. I instantly recognized the signature look of store-bought fried chicken when I began coating the drumsticks in the moist flour dredge. She recommends frying in vegetable oil on the stovetop, then transferring the chicken to a sheet pan to continue the cooking in the oven. I felt vastly more comfortable using this method, since frying in oil only always makes me nervous that the inside is not quite cooked while the outside starts to get too dark. The legs came out perfectly, and I went full-Southern with some hot honey. People who know me will be shocked, but I intentionally and willfully made a spicy accompaniment to my meal! Using some of my jealously hoarded Mother Tucker honey (available from my friend’s local apiary and I’d gladly share contact info if you want to purchase!), I added a generous spoonful of straight cayenne and stirred until the honey was deep red and flecked with the ground pepper. I microwaved it for just a few seconds (the “hot” honey name is derived more the from the spice than the temperature) and drizzled it over the chicken right out of the oven. OH. EM. GEE. Perfectly crisp, flaky chicken topped with sweet/hot honey followed up with a bite of waffle is inexplicably delicious. My Other Half was skeptical about this combination of foods, but he devoured it nonetheless once he got a mouthful. Another 10/10 winner! 

And now… it goes off the rails. I do not like #37 Red Velvet Cake. I do not like it from a box, I do not like it with an ox, I do not like it covered in lox… Ok, probably no one likes that, but my point is, most people think red velvet is great. Meh. And here is why: this cake called for 1 ounce of cocoa powder, and one ounce of food coloring!! Is she insane?!? No one needs to ingest a full ounce of red dye #40. Or even one slice-worth of that quantity of dye. I added maybe 3-4 drops of gel coloring, and the “pink velvet” it produced was good enough. I can taste the red dye in most versions of this cake, and I’ll tell you right now, it’s not yummy. The myth I’ve always heard before is that red velvet is “just chocolate cake with red dye added”, and I ask you, WHY? JUST GIVE ME CHOCOLATE CAKE! And may I refer you to the part where I said “1 ounce” of cocoa?? That’s barely enough to flavor a cup of milk, much less a whole cake. As far as I was concerned, this was straight up cake flavor. Which is no flavor at all. If it wasn’t pink, I’d say it was white cake, so this is a big no-thanks from me. I had one bite but wanted no more of it, although the frosting was pretty tasty. If you want red velvet, I can’t in good conscience recommend this recipe, but then again, I wouldn’t know a “good” red velvet cake if it slapped me, because I don’t think it exists. 

And back onto the rails!! Thank goodness there are very few Pioneer Woman recipes that I just don’t like at all. #38 Chicken Pot Pie is firmly in the YES pile! To be fair I like ALL chicken pot pies, and I even messed this one up. I was so intent on checking to see if I had all the ingredients that I made crust assumptions, which turned out to be incorrect. Evidently, the crust was supposed to go on top, and I had already dumped in the filling before I realized. I do feel like that would have been an improvement so the crust could be flakier, but my real preference is to skip the pie crust altogether and top it with puff pastry. Hands down, the best option! Nonetheless, this pot pie had all the hallmarks I look for: lots of veggies and plenty of chicken, and most important, a creamy, thick sauce. Eat with a spoon, eat it with a fork, but whatever you do, just eat it!

Beauties and Beasts

Believe it or not, I am nearly halfway through the “Pioneer Woman Cooks” already! The project has gone so quickly in fact, that I have begun re-making recipes I’ve already cooked in the past, but didn’t have photographs. Pics or it didn’t happen, right?! So far I have been fortunate enough to be “forced”, for the sake of thoroughness, to prepare Ree’s fried chicken again, and the above recipe, #31: Maple Pecan Scones. Oh bother… I can say without hyperbole that these scones changed my life by introducing me to Ree Drummond’s brilliance. On one typical Sunday evening many years ago, I was watching Food Network (and probably multitasking some other project as well) when the Pioneer Woman was on the screen discussing a light, flaky scone she loved to eat with her morning coffee. By the time she got to the part about the maple glaze, I had leapt off the couch, looked up the recipe on the Food Network app, and immediately set to making them. As per usual, her recipe didn’t require a trip to the store, and didn’t even have any of those pesky instructions such as “use room temperature butter”. Who has time for that when you want a scone NOW?? Luckily scones are prepared much like pie crust, so the colder the butter, the better. Now keep in mind this was several years ago, and I had yet to undertake a Pioneer Woman cookbook project, so Ree was still an unknown quantity. For all I knew, she was lousy at writing instructions, and I was dubious when I began mixing the dough. It was so loose and powdery that I kept re-reading to make sure I hadn’t missed a wet ingredient somewhere. Nope, she said it will appear “dry and crumbly”. Check and Check. Next I portioned the wedges out how she directed, but I was too used to Starbucks petite vanilla scones, those little two-bite wonders. These things looked like a slab of pizza. I halved the wedges, and figured I could bring the excess to share at work since there was no way I’d want to finish the whole batch myself. I’d like to state for the record that I was wrong, wrong, wrong. I’d never made scones before, so I learned that they don’t change much when baked. The size they go into the oven is pretty much the size they come out, so cut the pieces smaller at your own peril. You’ll probably end up eating two! Her sweet maple drizzle was quite literally the icing on the cake; sweet powdered sugar glaze tempered with a touch of salt and of course maple extract perfectly balances the most tender dang scone you’ll ever eat. I’ve made these a half dozen times at least, and I can attest that the platters I bring to work don’t make it an hour before being wiped out.

Though a dietician might argue, technically scones can reasonably be called a breakfast food. But I would just as easily classify them as dessert, much like recipe #32: Marmalade Muffins. It’s in the Breakfast section, but the brown sugar glaze that soaks the tiny cakes makes them a delicious post-meal bite. I wasn’t terribly excited to make these in the beginning because my Other Half has mentioned he doesn’t care for marmalade. Since they are a mini-muffin, I didn’t want to be stuck eating 24 of these puppies by myself. I needn’t have worried. First of all, there is no marmalade in them at all. Ree’s description of the recipe mentioned she named them due to the tiny bits of orange zest in the batter and glaze made with the freshly squeezed juice. The glaze is wonderfully thin, so you can really drench the muffins and let it sink in, resulting in a vibrant-tasting, sweet treat with a refreshing citrus punch. When my teenage daughter dragged herself from her room long enough to investigate the source of the delicious aromas wafting from the kitchen, she proclaimed these a winner and demolished the whole batch within a day or two!

Steak is my love language! I could happily eat beef every day of my life and never get bored with it. For a cattle rancher’s wife, Ree didn’t feature near enough beef recipes in her first cookbook. This one was a shining star that I eagerly awaited from the moment I saw page 166, #33: Rib-Eye Steak With Whiskey Cream Sauce. I already know how to cook a steak indoors, seared in a screaming hot cast iron skillet, then broiled for just a minute or so to perfect medium rare. Steak and I go way back… What I don’t do very often is top it with anything. As much as I love rare beef, I also love whiskey and for that matter, I love cream! This couldn’t be anything but delicious. The photographs in the book didn’t quite look like mine; for some reason Ree’s sauce darkened much more, though my onions were perfectly caramelized and tender. I let it simmer for quite awhile, but it just didn’t reach the deep brown color I was going for. In fact, someone who saw it asked if it was peanut butter on my steak! Blasphemy… Luckily, looks aren’t everything, and no matter how pale it turned out, it was still whiskey cream sauce, and I would happily welcome it back onto my plate.

Remember when I said that looks aren’t everything? Keep that thought firmly in your head, because this last dish was U-G-L-Y. #34: Migas was not high on my list of recipes I couldn’t wait to try, but to be fair I didn’t hate it. Evidently the name of the dish translates to “crumbs”, and I have to agree it looks more like a pan full of what you would scrape off the grill after the breakfast rush at Village Inn. Essentially this is an egg scramble with peppers, onions and cheese, and for some reason, fried corn tortillas. Those crispy little bits of tortilla sealed the deal for me, because otherwise I think this could have been somewhat bland and mono-textured. Ok, yeah so I skipped the jalapeños, sue me! Will I make it again? Maybe not. But I might… might… order it at a restaurant. Considering this recipe looks like it should put a bag over its head, that’s a win!

Fat to Fit…To Fat Again!

When you think “country food”, what image comes to mind? Watermelon slices, speckled with black spittin’ seeds, served on a big platter on a hot summer’s day? Or perhaps sweet iced tea in a tall, sweating glass full of ice cubes? Could be that you imagine a plateful of buttermilk biscuits swimming in sausage gravy with a mess of bacon on the side. For me, it’s “chicken fried” anything. Recipe #26 was the daddy of all the chicken frieds: Chicken Fried Steak. Since I hail from Alaska, about as far away from the Deep South as one can get without actually being Canadian, I did not grow up with this country staple. In fact I had never even heard of it until I saw it on the Denny’s menu as a child, and at that age I didn’t order anything unfamiliar or what I considered “weird”. I honestly thought that what I was looking at in the picture was a regular steak, inexplicably coated in breading, then doused in white gravy. I was unimpressed. Why ruin your juicy steak by frying it?!? And gravy is supposed to be brown, I tell you, BROWN! Needless to say, I slammed that menu shut on the monstrosity of chicken fried steak, ordered my cheeseburger and fries and got on with my meal. Fast forward through many years of expanding my palate (and waistline) to me watching some cooking show or another. I missed the beginning, showing the preparation steps, but the chef was serving up heaping platters of chicken fried steak and mashed potatoes, and for the first time in my life, I was chicken fried-curious! I Googled a few recipes, discovered that what was inside the breading was actually something called “cube steak”, then headed to the store to figure out what the heck that was. When I located it by reading every label in the beef case, I couldn’t see how it was any different than a large hamburger patty, smooshed down with a mallet. In fact, I still feel that is a fitting description, since it is made from top round or top sirloin and just beaten into submission with a meat tenderizer instead of a grinder. Po-TAY-to, po-TAH-to. Anyway, back to dinner! The moral of the story is that I didn’t much like the recipe I had chosen, as the whole thing was too salty for my taste, and I didn’t dig the texture. The somewhat flavorless breading floated off the steak while I was frying it, and burned up in the oil while I made multiple servings, which of course caused a scorched flavor to permeate. I put chicken fried steak firmly back into the “Nah” column. Well, here I am again, another five years down the road and working through the cookbook of a real-life ranch wife, so it was inevitable that I would again come face to face with my nemesis. Let’s start with the positives: cube steak is cheap as heck, particularly when you buy it at the commissary. I can’t often purchase a main protein for a little over a dollar per serving, so that was nice. Ree’s recipe called for more seasoning than just salt and pepper, another bonus, and the breading liquid combined milk and eggs, so I had a feeling I would get better adhesion. Another edge Ree had over the previously Googled recipe was the fact that she triple-breads her steaks; the flatted meat easily doubled in thickness once I thrice-dredged it in liquid and flour, and it did in fact hold on much better in the pan. Ok, so that concludes my list of what I liked about chicken fried steak this time around. I still think the texture is closer to “mushy” than “tender”, and I maintain that brown gravy is the best gravy. I absolutely cannot stomach the idea of using a big pile of grease to make white gravy. Yes, I know I am in the minority here, but I just can’t do it. Don’t get me wrong, this was leaps and bounds better than my previous attempt, but still not my fave. The Other Half did not appear to share my opinion; he demolished a CFS the size of his head.

From the Lard Side to the Light Side, the next recipe had approximately 14 calories in the entire bowl. Nothing but onion, cilantro, jalapeño, tomato and lime juice with a touch of salt. I think I ate one tortilla chip with this mixture on it. It was fine. Yep, that’s the whole story. I’m generally not a big fan of Pico de Gallo, but again, the Other Half gave it a vigorous stamp of approval. In fact, he got creative with it and topped the next recipe, Simple Perfect Chili, with a generous helping of this pico and raved!

Now here’s something to talk about! The name says it all, as this chili is pretty much perfect the way it is, as a topping for hot dogs, over tortilla chips as nachos, or as a stand-alone bowl layered with cheese, onions and Fritos. My Ohio-born honey decided to use it to make his own version of Cincinnati chili. If you aren’t familiar, that’s chili served over spaghetti! He added a pile of pico on top, and was quite proud of his creation. I topped my bowl with a handful of cheddar, and was pleasantly surprised that the combination worked so well. This recipe seemed suspiciously familiar as I was making it, and sure enough, an exact doubled version appeared in Ree Drummond’s Dinnertime, which I cooked my way through several years ago. Then it was titled “Make-Ahead Chili”, since you can prepare it to eat now or freeze it in a Ziplock bag laid flat. I’d recommend doing that, so you can thaw a little or a lot whenever you find something to dump chili on! And really, that is a lot of things…

The mix-and-match recipes continued with something we can actually keep making while on this dratted diet plan: Breakfast Bowls. I love any recipe where you can easily swap out ingredients to customize your meal, and this one basically calls for dumping the kitchen sink into a ramekin, dousing it in egg mixture, and baking it. Sausage? Check. Bacon? Check. Cheese, potatoes, tomatoes, basil, more cheese, onions, an old shoe you found in the back of the closet? Check, check, and so on. Really, the possibilities here are endless! Maybe less meat, more veggies, such as mushrooms, spinach and peppers, or sweet potatoes and butternut squash. Maybe ditch the veggies altogether and double down on breakfast meats; you do you! I personally could have skipped the bacon and just included sausage crumbles (I know, it’s sacrilege to delete bacon, but it made the breakfast bowl saltier than I prefer!) Using frozen Potatoes O’Brien, which already have little flecks of peppers and onions, or even plain old frozen hash browns is a step-saver. The great thing is that even though these were potentially chock-full of calories, making some slight tweaks (remove a few yolks, use turkey sausage, whole milk instead of half-and-half in the egg mixture, etc.) means even dieters can still have a satisfying, protein-rich meal that reheats beautifully and contains a ton of flavor!

Hello Pico de Gallo… we meet again! Yep, if you are having a sense of deja vu, it’s because you are looking at Ree’s recipe for Guacamole, which she eventually realized after years of preparing separately is literally nothing more than adding chunky avocado to her pico recipe. Of course you mix it all up together, but it looked so much prettier before I hit it with the masher! I am sad to report that as sometimes happens, my cooking got ahead of our tummies. We couldn’t eat our way through all the food in the fridge and this little bowl was hidden until it was too late. I never even got to try a bite before it was beyond the boundaries of what I consider edible! I guess that just means I have to make it again and sit down with a bowl of tortilla chips on my next “cheat day”. Oh darn…

Carbs, Carbs, and More Carbs!

There is no sweeter sound to a mama’s ears than your kid saying, “Heezergud!” while they chow through something homemade. (For those who don’t speak Mouthful, that’s “These are good!”) When you have a teenager, those compliments are hard to come by, as everything is met with either a shrug or a sullen “fine” when you ask how they like it. This was the high praise received for #22 French Breakfast Puffs. I quite liked these myself, one, because the most exotic ingredient was shortening, so I can easily whip these up on any given Sunday, and two, because they are coated in melted butter and rolled in cinnamon sugar! How can you go wrong there? (Clearly, I am still rounding up recipes I prepared earlier in the year, prior to kicking off my pre-wedding diet.) If you’re looking for a weekend treat, look no further than these puffy, sugary donuts disguised as muffins! Because muffins are healthier, right??

Ah, potatoes. I miss you. I’m 10 pounds closer to my goal weight, but I miss CHEESY POTATOES!! #23 Twice-Baked Potatoes, takes your good ol’ steakhouse loaded baker and doubles down on the yumminess. Not only do they contain butter (TWO STICKS!!), bacon, green onions, and cheese, but also sour cream and milk blended in, along with tasty seasoned salt and pepper. It’s the best of baked potatoes and mashed potatoes smooshed together! These are a little labor intensive, since you have to bake them early enough to let them cool and scoop out the innards, then mix up the filling and re-stuff the skins, but the result is absolutely worth the extra effort. I have yet to figure out how to lighten this recipe up, because I refuse to skimp on a single delicious ingredient. Just hide your scale!

And now, to pasta. I was surprised during my trip through the last cookbook, Magnolia Table, that Chicken Spaghetti was among the biggest hits for the family. When I made Pioneer Woman’s version, it actually got even higher marks! Of course, I didn’t leave the recipe alone, because life is too short to eat pimientos. I ditched those, but included finely diced, fresh red pepper instead. I’ve come a very long way from when I used to substitute tomatoes any time red pepper was required! (They’re both red, right??) I continued to take a stand against green bell peppers. Just. No. Aside from those modifications, I stuck to the written directions, which meant that this meal was almost entirely effortless; a store-bought rotisserie chicken and some cans of cream of mushroom did most of the work, and conveniently I was able to use previously chopped “mise en place” veggies (a.k.a. leftover ingredients from Breakfast Bowls, to be discussed later!) We are a saucy sort of family, meaning we adore food swimming in sauces, dressings, drizzles, glazes, what-have-you. Dry is the enemy of yummy, and in this case if the soup didn’t make the casserole moist enough, the handy addition of pasta water kicked it up a notch. Chicken Spaghetti has now earned a firm place on my Comfort Food Hall of Fame!

I’m telling you, writing this blog while on a diet is sheer torture! But remembering these beauties is blissful… You do NOT need to venture out to your local pub in order to enjoy heavenly PW Potato Skins. These are remarkably similar to the aforementioned Twice Baked version, but the biggest difference is the treatment of the skins, my favorite part. You start the same exact way, baking taters until they are soft enough to hollow out, but then you brush the hulls with canola oil and salt and give them a nice char in a hot oven. Once they are crispety-crunchety, throw on some chopped bacon and cheese, broil for a few more minutes, and voila! Heart attack on a plate, but I’m willing to risk it. Don’t forget to dip them in sour cream! Then maybe have a salad… Even I know when enough is enough!